How to Use
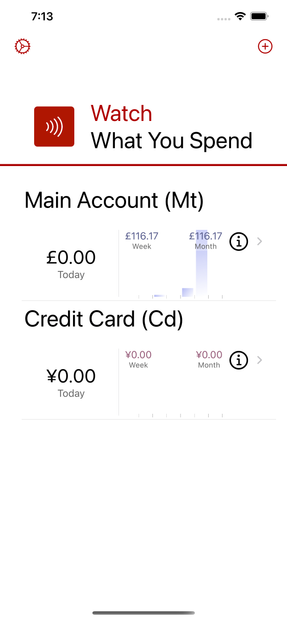
The Home Screen shows the currently configured accounts.
On selecting the Plus button, you can create a new account. Swipe left on an account to delete it.
NB: Deleting an account permanently deletes all the associated expenses of that Account.
The Home Screen also gives access to the App Settings.
Selecting account opens the account Expenses List. The i on each Account lets you edit the details of the Account.
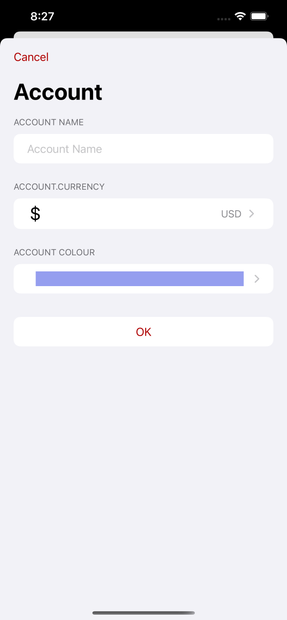
New Account
You are asked for the following information:
- Name of the account
- The home currency for the account - your locale will be used to suggest one, but you can change it using the picker.
NB: The home currency cannot be changed once an account is created.
- A colour to help identify the account easily (also used on the Watch Complications where applicable)
Settings
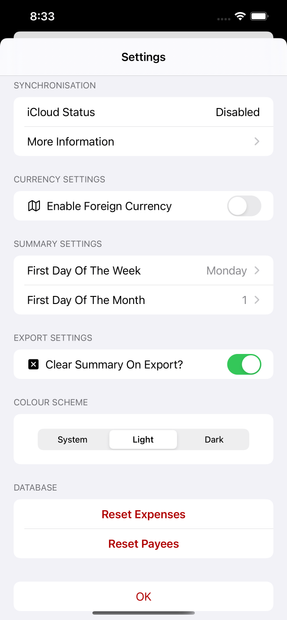
The Settings page has the following features:
- Synchronisation
- iCloud Status shows where or not WWYS can successfully synchronise data to iCloud. For this functionality to work correctly your iPhone must be logged into an iCloud account and access enables in the iCloud system settings at:
Settings > Apple ID > iCloud
- If Status is shown as disabled then the iPhone is not logged into an iCloud account or sync has been disabled. In this case the iPhone will use a local database.
- Synchronisation will resume whenever the iPhone is logged into a valid iCloud account.
- To synchronise with the iPhone Companion App then both devices must be signed into the same iCloud account.
Currency Settings
- Foreign Currency
Turning on foreign currency, adds an additional page during Expense creation, which allows handling of foreign currency expense.
You can set the default foreign currency to be used, although this can be modified on a per Expense basis.
- Summary Screen Settings
- First Day Of The Week
Select which day of the week will be the starting day for calculating the weeks total spend on the Summary screen.
- First Day Of The Month
Select which day of the month is considered the start for calculating the monthly total on the Summary screen.
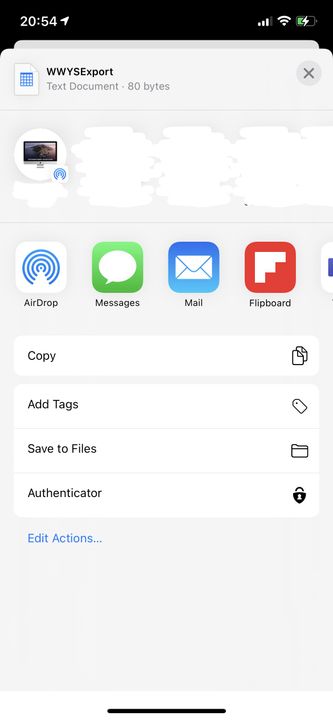
- Export Settings
- Clear Summary On Export
If switched on the Day/Week/Month totals shown on the Account Summary on the Home Screen are cleared after an export.
- Colour Scheme
- The Colour Scheme selector lets you choose to force either light or dark mode specifically for the WWYS App, or use the overall system setting.
- Database Settings
- Reset Expenses
Clears the database of all expenses.
- Reset Payees
Clears list of previous Payees. Payees would normally be
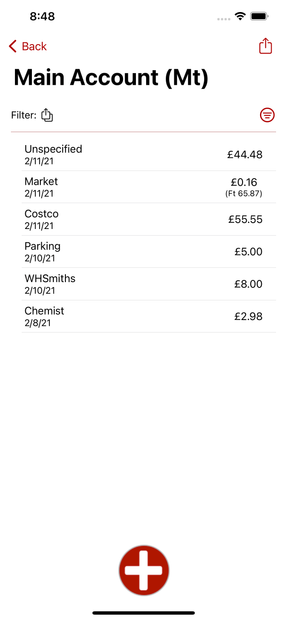
Account Expenses
Filter
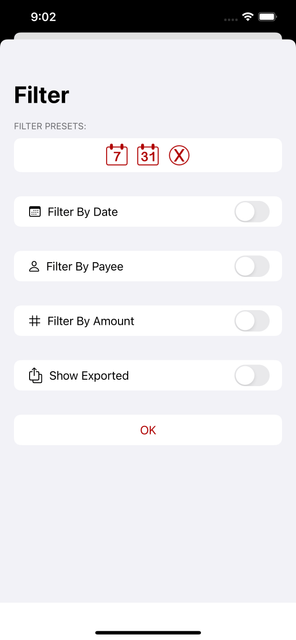
The Filter button brings up a screen to allow you to construct a Filter on the Expenses displayed. You can choose and combine the following in your Filter:
- Date range
- Payee (to select expenses that have an unspecified Payee name just turn on the filter and leave the search string blank)
- Amount range
- Show Exported Expenses. This shows previously exported Expenses which by default are hidden.
Each filter can be applied on its own or in combination.
The Presets at the top of the screen setup some frequently used filter combinations.
Creating an Expense
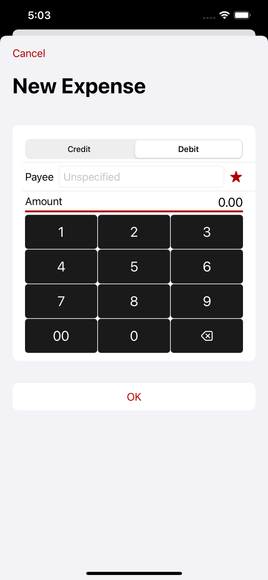
Selecting the PLUS button on the Account Expenses screen allows the creation of a new Expense.
The top sector allows either a Credit or Debit Expense to be created.
The Payee field allows text entry of the Payee name for the Expense (max 30 Characters). The most frequently used payees are listed available from the favourites by selecting the Star icon to the right and can be selected to speed up entry of most commonly used Payees.
NB: If you wish you can leave Payee blank (for those really quick Expense entries) and the Payee will be recorded as "Unspecified".
The Amount field lets you enter the amount with a simple number keypad that scrolls digit to the right as you add them in the manor of a calculator. The "00" key is provided to speed up entry of numbers like £10.00, requiring you to press the "1", "0" followed by the "00" keys.
The delete key removes the last entered digit and the number scrolls to the right.
The final Confirmation page allows you to check that everything is as expected and confirm the Expense entry with the OK button. The pop up pages then disappear returning you to the top level Summary page.
Foreign Currency Expense
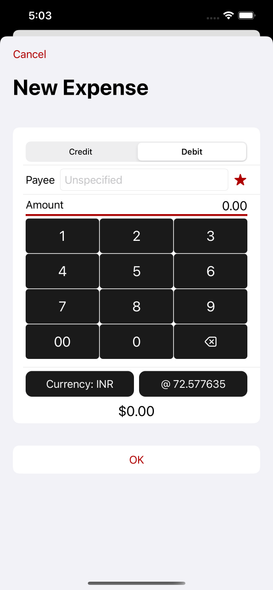
Foreign Currency is an option in Settings page that you must turn on to be able to create Expenses in a different Currency to your home currency (selected when first creating an Account). When enabled, an fields are provided during Expense creation.
This will present the Amount entered and allow you to select the Foreign Currency (to speed up entry, the initial currency will be the one you selected as your default foreign currency in Settings). The exchange rate for your selected currency will be obtained from the European Central Bank's web service, to give an estimate of the Expenses value in your home currency. This will be used to calculate Daily and Weekly spend.
The concept is that this allows you to keep track of foreign currency spending on a day to day basis. The value in both currencies is recorded and provided in the CSV file export so that when you import the data in your main account tracking software you will have enough information to match the Expense when reconciling using the bank statements that show the actual exchange rate that was used.
The exchange rate will only be an estimate as individual banks will use variations of the rate and may also have additional charges. You can enter your own rate if it is known by tapping theExchange Rate and entering it manually.
NB: Should network conditions mean that exchange rate data is unavailable, then it will default to a value of 1 and be highlighted in RED, to indicate that you should enter it manually.

